Cinema Management System
Hello everyone. Here I will show detailed information and execution steps about a PHP-based Cinema Management System project. You can follow my Github account for source codes:
Technologies Used
- HTML
- MySQL
- JavaScript
- jQuery
- PHP
- Bootstrap
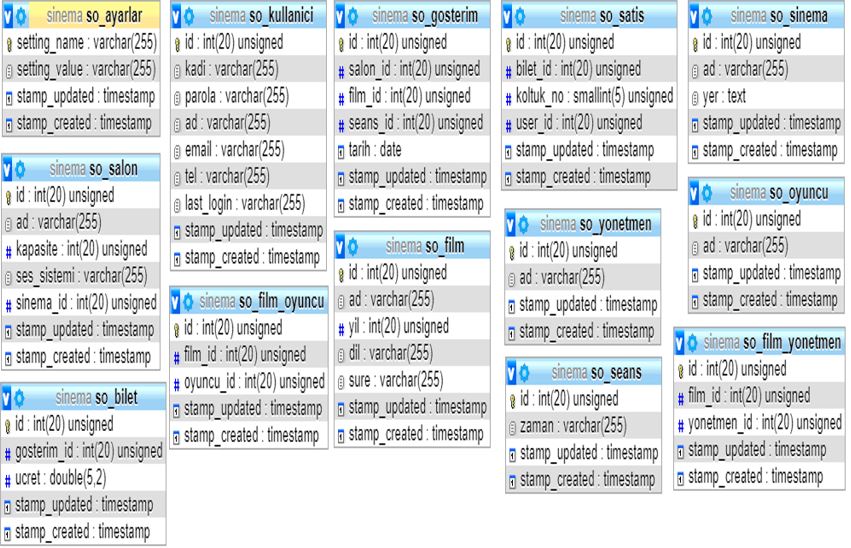
In our Cinema Management System project, which we chose PHP programming language and MySQL query language, we have two login screens as User Login and Admin Login. Bootstrap is also used in our work. In our project where we use MySQL as a database, we have 13 tables. You can see our tables below:
Running the Project
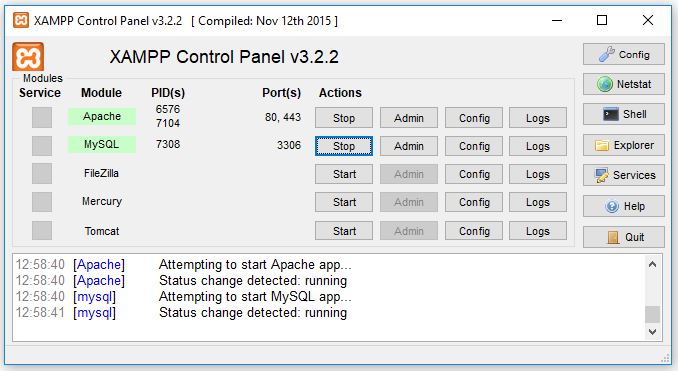
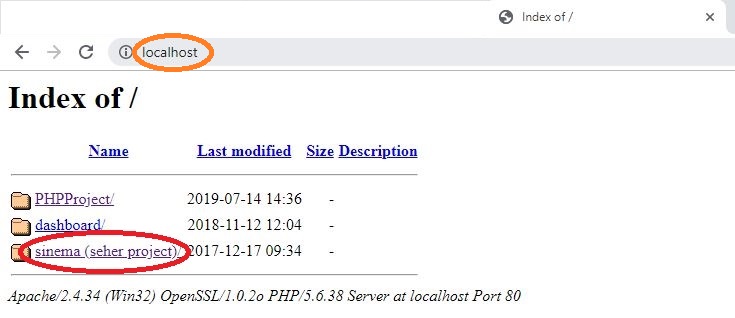
To run the project, first we need to open the XAMPP program installed on our computer and start the Apache and MySQL options.
Then we type localhost in our web browser and select our project that we have previously added to the database. This option will redirect us directly to the login page of our project.
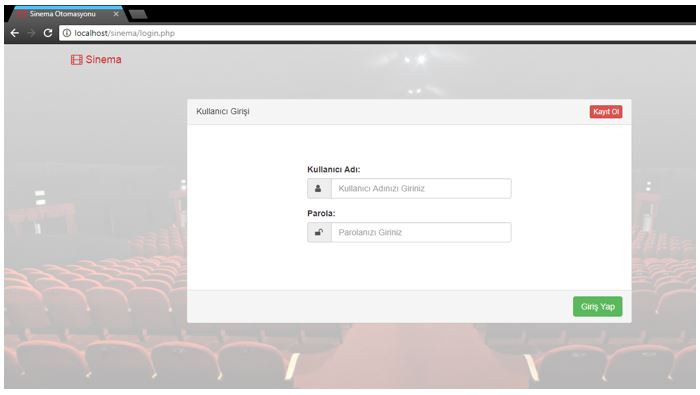
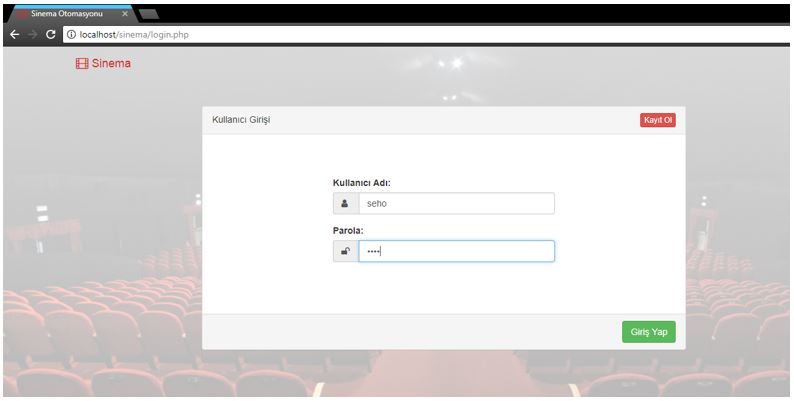
On the first page of our project, there is a login screen. We can login as User Login or Admin Login. The steps we can apply as User and Admin Login are listed below.
User Login
Here, if the user is registered, they can log into the system by entering their information. If they are not registered, they can register with the register button.
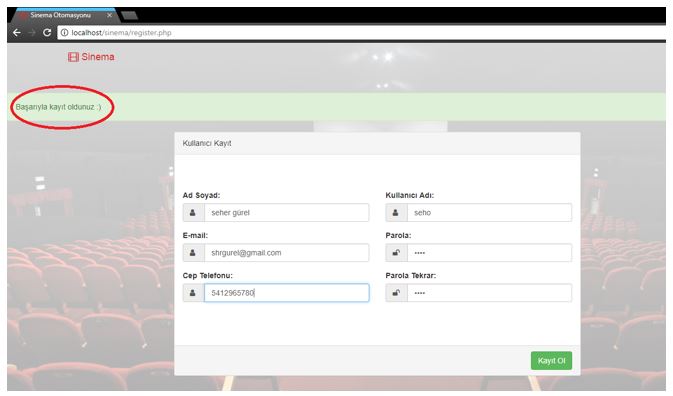
Our page used for new user registration looks like this. They complete the registration process by correctly completing the given information and pressing the register button. Then it gives warnings such as "Registration successful" or "Registration failed". The reasons for unsuccessful registration may be missing information or attempting to register with an already existing account:
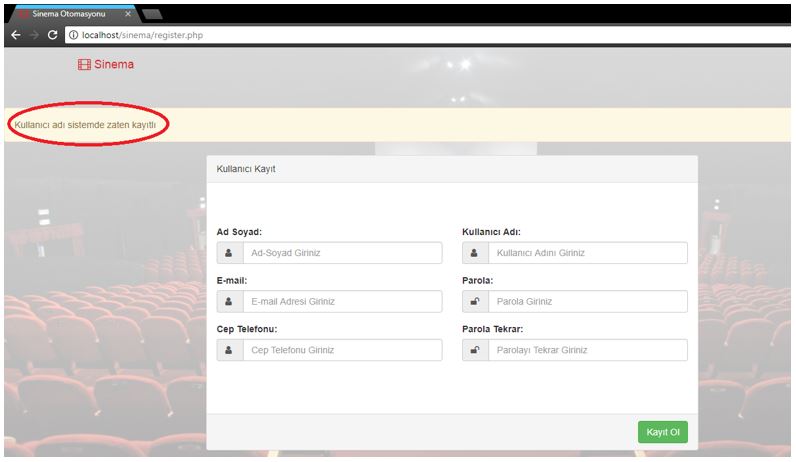
The warning given upon a registered user's request to register again is as in the example:
After registering, we can now log into the system. After entering the required information, we log into our system by clicking login:
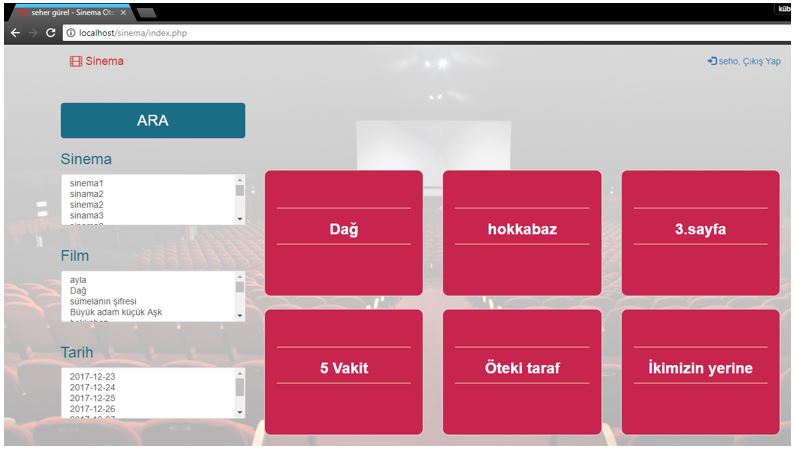
Our page that we will encounter after user login looks like this. The user can search by selecting from "Cinema, Movie and Date" options or make their selections with the current interface provided.
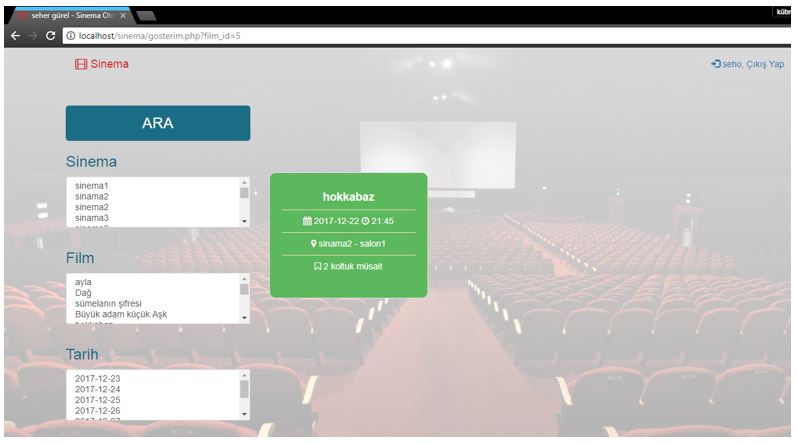
Let's assume the user selects the movie "Hokkabaz". As seen in the picture, it shows the number of available seats of the movie and makes a redirection.
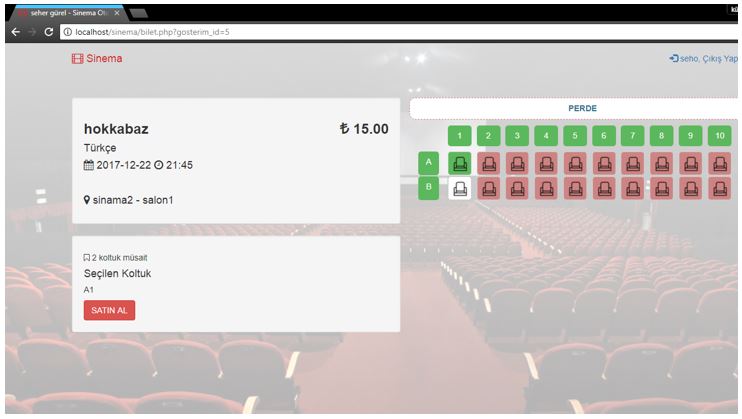
If there are available seats, we click again and select the seat numbers we want and make the purchase. Red seats are occupied, white seats are empty, and the green one is the seat we selected. After the purchase, the green color will turn red.
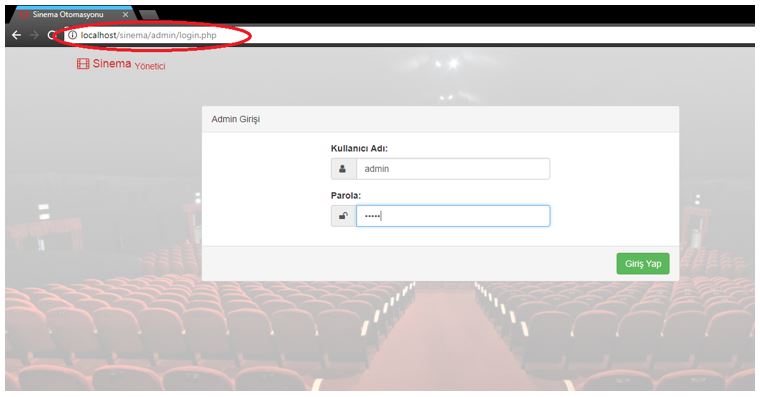
Admin Login
Our admin login screen also has the same features as the customer login screen. We can log into our admin page by entering the required information.
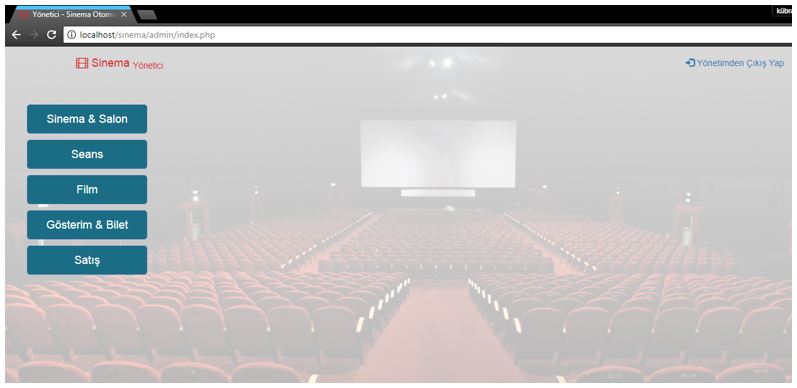
The admin page allows us to enter information about movie showtimes, screenings, ticket transactions, etc.
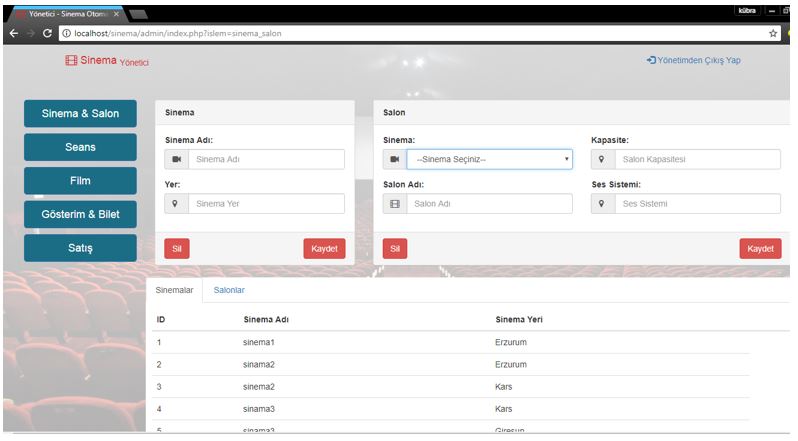
Information we can enter and see when we click Cinema&Hall:
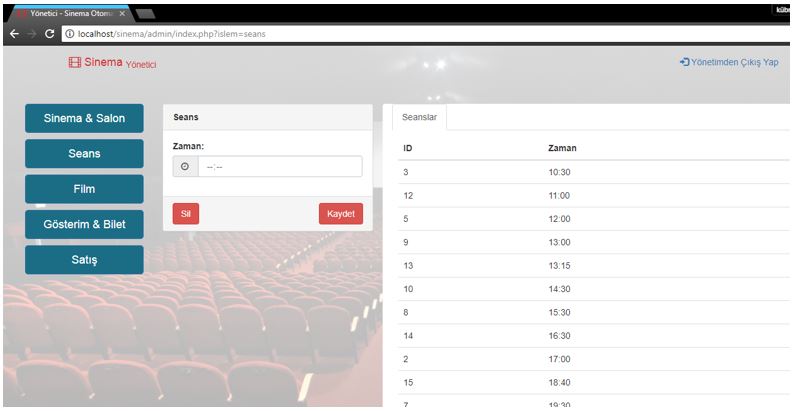
Information we can enter and see when we click Session:
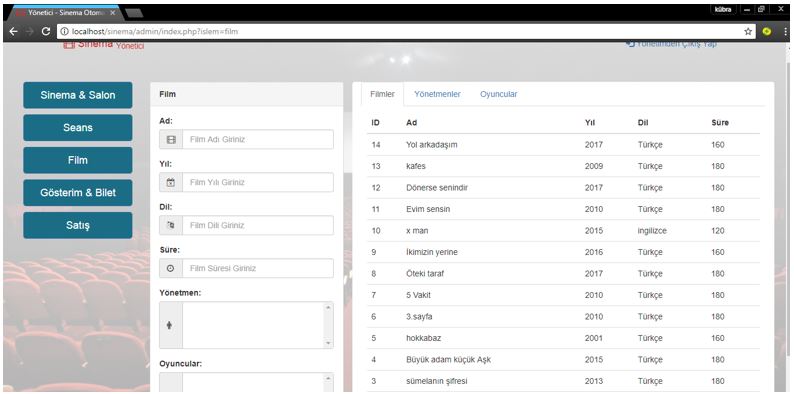
Information we can enter and see when we click Movie:
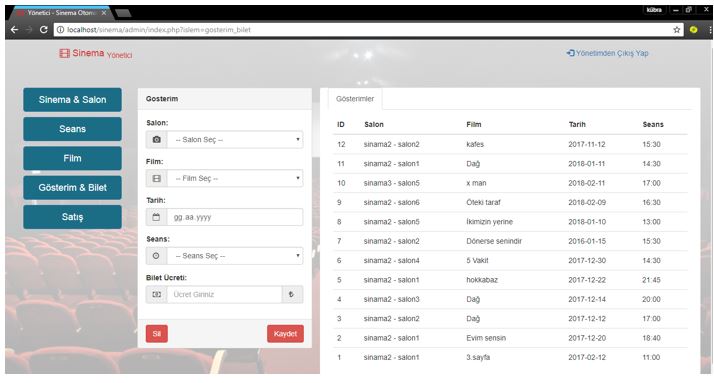
Information we can enter and see when we click Screening&Ticket:
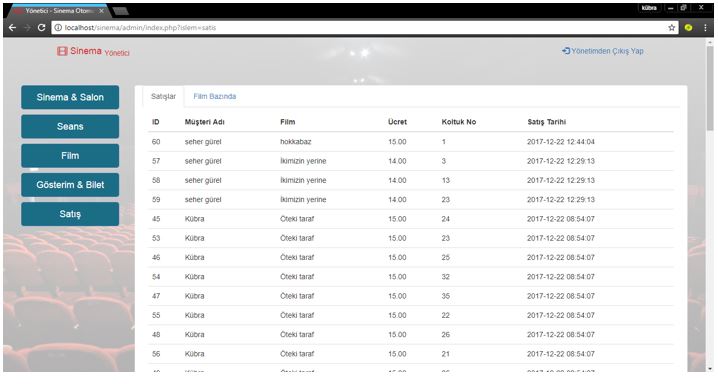
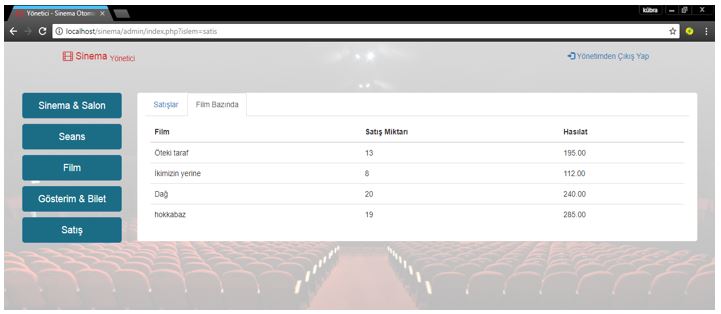
Information we can see when we click Sales: