Simple Node.js Application and Heroku Usage
Hello friends. In today's article, I will talk about concepts like RestAPI and Node.js, and together we will develop a simple RestAPI example and see how to upload this example to the HEROKU platform.
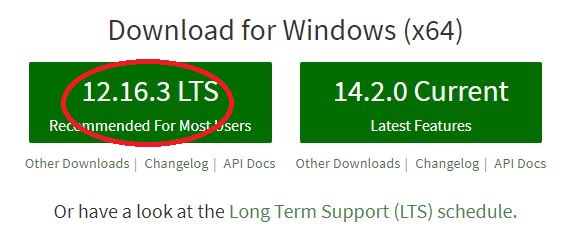
Before starting to write the application, we need to have the necessary environments to run the application. For this, first, if we don't have Node.js on our computer, we need to download it. Node.js is a runtime environment developed for network-connected applications that allows commands written in JavaScript to run on the server side. To get Node.js on our computer, we can easily download it from its own website.
Hello World Application
After completing the download process, let's look at Node.js usage with a simple example. Let's create a file with .js extension inside a folder and write the following codes into it.
//For the required external express module
var express=require('express');
var app=express();

app.get('/',function(req,res){ //this method sends a request to the http root directory
	res.send('Hello World'); //we get the hello world response
});

app.listen(8080,function(){ //our application will run on localhost:8080 port
	console.log('Web Server is running at http://127.0.0.1:8080/');
});
We use the express module to develop web applications with Node.js. This module is necessary for methods like get that we will use in our application. We will run the application by opening CMD in its own root directory.
First, let's run the following command to create the package.json file.
$ npm initThen let's download the external modules we used in the code, namely our express module.
$ npm install express -sAfter completing the external download processes, we can run our application.
$ node helloworld.jsWe can see the result by running the localhost:8080 port in our browser.

In this way, we have seen how to run a simple and basic Node.js, Express application. From here on, I will talk about how to display data retrieved from a JSON file in the browser, and we can use this data in different applications we will develop in the future.
Simple RestAPI Application with NodeJS, Express, JSON
Now let's go step by step together. First, let's create a file with .json extension inside a folder and write the data we want in JSON format. My sample JSON data is as follows:
[
    {
    "ad": "seher",
    "soyad": "gürel"
    }
]
Now it's time to write our Node.js codes. Let's create a second file with .js extension inside the folder and write the following codes into it.
//we define and initialize the express module
var express = require("express");
var app = express();

var data = require("./app.json"); //we request data from our app.json file

//we send the data in our json file as a response to our http page
app.get("/", function(req, res) {
  res.json(data);
});

app.listen(5000, function() {
	console.log("Server running on port 5000...");
});
To run the application, as I mentioned above, let's open CMD in the directory where the application is located and run the following commands in order.
$ npm init
$ npm install express -s
$ node app.js
When we run it in the browser, the result we get will be as follows.
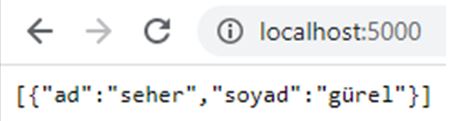
Up to this point, we have tried to understand the definition "REST API is a system where software developers make requests like GET and POST using the HTTP protocol and receive responses to these requests in various formats." by practicing. In the next step, we will discuss what we can do to use our own developed RestAPI not only on local computers but also in different environments. We need a domain to use our API on different computers as well. We can buy a domain from paid sites or take advantage of some free platforms. I took advantage of the HEROKU platform, which offers a limited number of free domain rights for my own API. Now let's see what steps we need to follow.
HEROKU
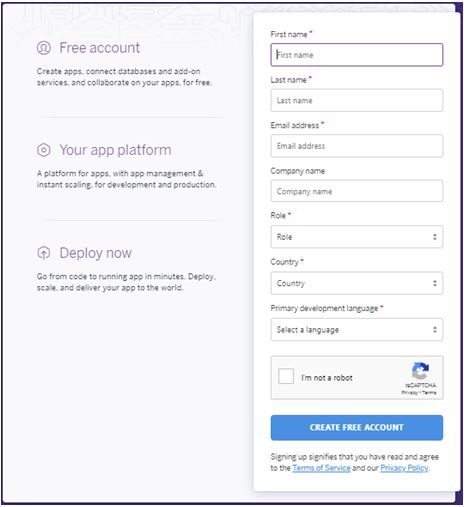
Heroku doesn't support every language. You can upload your applications written in languages like Node.js, Ruby, Java, PHP, Python, Go, Scala, Clojure to Heroku and use a free domain. To upload our own application, we first need to create an account. You can create an account by visiting Heroku's own website.
Then we need to install Heroku CLI to be able to control applications.
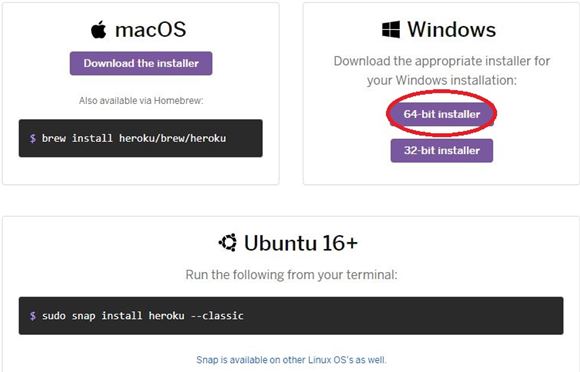
You can download from the link suitable for your operating system. Since I use Windows, I downloaded the link in the figure. We complete our HerokuCLI installation quickly and simply from the downloaded file. To confirm that we have completed the installation without any problems, let's open command prompt and do a version check.

From here on, there are a few things we need to do. To be able to run the application with Heroku, we will make some additions and changes within this directory. First, let's create a file named procfile without an extension and add the following line to it.
$ web: node app.jsThe procfile file is required to declare various process types in Heroku. For more detailed information, you can benefit from this link.
Then we make the following changes in our code.
//External modules
const express = require("express");
const app = express();
//we use the cors module to be able to run this application in other applications as well
const cors = require('cors');
app.use(cors());
app.options('*', cors());

//Use PORT 5000 if there is no pre-configured port
const PORT = process.env.PORT || 5000

var data = require("./app.json");

app.get("/", function(req, res) {
  res.json(data);
});

app.listen(PORT, function() {
  console.log("Server running on port 5000...");
});
If we don't use the cors module, our application will not work on other platforms or applications. With this module, we can use our application on heroku or in different applications we develop. The reason for the change in the port variable is that it is more appropriate to specify it this way for the port to work properly in environments like Heroku. After saving the changes in our code, let's run it locally and check.
$ npm init
$ npm install express -s
$ npm install cors -s
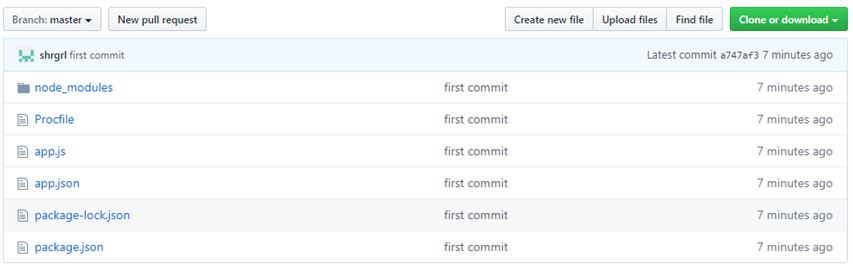
$ node app.jsAs we can see, our application ran smoothly on our local computer as a result of the changes we made. If there are no problems up to this point, we can proceed to the main part. Since we will upload the application via Github, let's first create a new project on Github.

Then let's add the application to our Github project using Github Bash with the following commands.
$ git init
$ git add .
$ git commit -m "first commit"
$ git remote add origin https://github.com/shrgrl/example-rest-api.git
$ git push -u origin master
After all commands are finished, it means our application has been uploaded to our Github project.
Then we will clone our Github project to our computer and upload it to Heroku. For more detailed information, you can look at the article about uploading Node.js projects on Heroku's own website here.
First, we open CMD and write the following command to work with Heroku and log in from the screen that opens in the browser.
$ heroku login

After successfully completing the login, we clone our Github project to our computer.
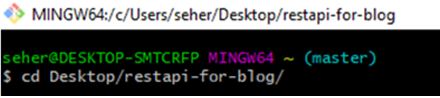
$ git clone https://github.com/shrgrl/restapi-for-blog.git
$ cd restapi-for-blog
Now let's create a Heroku project and add all our files to this project. If you want, you can name it yourself like me, or you can have Heroku give a random name by not writing any name.
$ heroku create restapi-for-blog
Let's make sure we have successfully created the new project because Heroku can be a bit picky about naming. As the final step, we will upload the application to the Heroku project we created.
$ git push heroku masterLet's make sure we get an error-free result. If everything goes well, after this command finishes running, there should be a result similar to the following in the last part of the output.

Our application has been successfully uploaded and now we can run it.
$ heroku openAfter the command, an automatic tab will open in the browser.

Or you can run it by clicking the Open app tab in the upper right corner of the project you created in your Heroku account.

Now you have a free RestAPI domain.

You can use this API in any projects you want. I hope this article will be useful for you too to convert data into a free API. See you in the next publication...
← Back to TECHNOBLOG