Java Hospital Management System Application
Hello everyone. In this project, I will explain a Hospital Management System application written in Java. You can follow my Github account for source codes:
Technologies Used
- Java
- JavaSwing
- MySL
When starting a Hospital Management System automation project, there are topics we need to master first. We need to have knowledge about Java Swing and MySQL database topics. The project involves a connection from the program to the database. Basically, to connect from a programming language (JAVA or another language) to a database and retrieve data, the following three steps should be followed:
- Creating a connection to the database (connection)
- Executing a query through the connection
- Storing the query result in a data structure (Datastructure)
Creating Database Connection
At this stage and in subsequent database operations, we use the java.sql.* package available in JAVA language. For this package;
import java.sql.*;we add this line to the beginning of our code. To create the connection, we create an object from the java.sql.Connection class. We can use the following line for this operation:
Connection con = DriverManager.getConnection(
  "jdbc:derby://localhost:1527/xyz;user=username;password=userpassword;");
In the line above, an object named con has been created and attempted to connect to the database named xyz located on the local computer (localhost) with the username username and password userpassword. 1527 is the port number of JavaDB installed on our computer. 1527 is the port number of JavaDB installed on our computer.
MySQL Database
MySQL is an open-source database system used on Unix, OS/2, and Windows systems. The record-keeping process required for a web-based tracking and automation system is done very quickly and easily with MySQL. It can also be used to keep records of your desktop programs' data; this can be within programs that can store information such as accounting programs or a registry, etc. PhpMyadmin, which you often hear about along with MySQL, is a program necessary to easily manage MySQL and quickly perform database operations. You can process many records into your database with PhpMyadmin. Additionally, MYSQL can be run compatibly with both asp and php pages. MYSQL database access time is quite fast. MySQL really makes a difference compared to other database management systems in this regard. Many programs can be used for MYSQL database management. The management program I call PHPMYADMIN is among the oldest and most used programs. "MySQL-Front" is also one of the MYSQL database management programs that has been used quite frequently recently.
Below, I have logged into a database for you with two different programs. As you can see, the only difference between them is actually the locations and names of the buttons. In the end, what you do is nothing more than managing a MYSQL-type database. However, I prefer to use PHPMYADMIN.
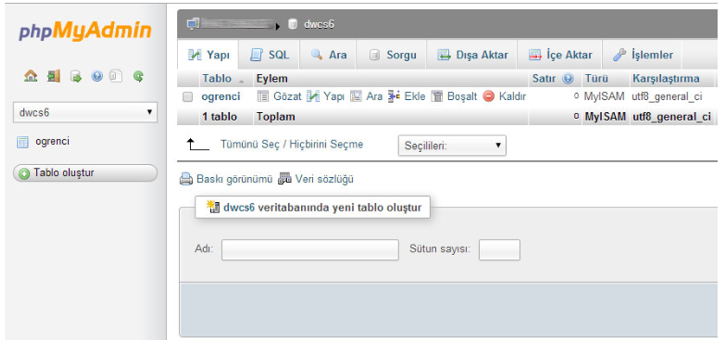
Creating MySQL Database
After making a brief introduction to MySQL and gaining basic information, I learned to create a database. However, before creating a MySQL database, the MySQL database server and phpmyadmin database manager need to be installed on our computer. The XAMPP application that was already installed on my computer served my purpose. I continued by making use of it.
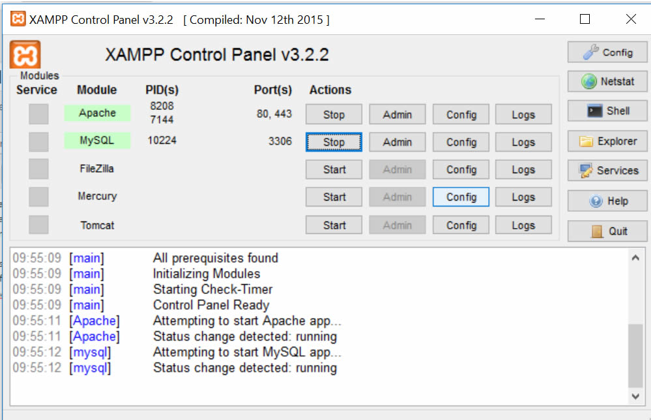
After running XAMPP, we need to start Apache and MySQL. We type "http://localhost/phpmyadmin/" into the URL address of any internet browser. On the screen that appears, we start the process of creating a new database with the new link located on the left side.
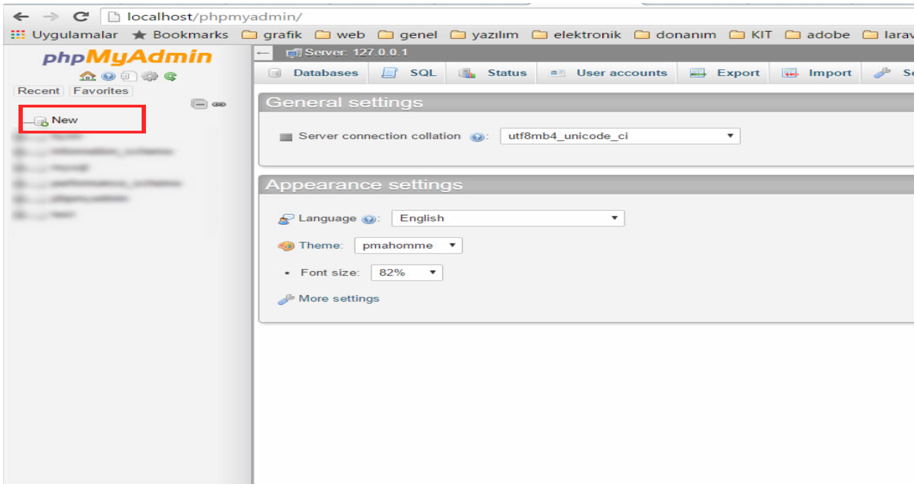
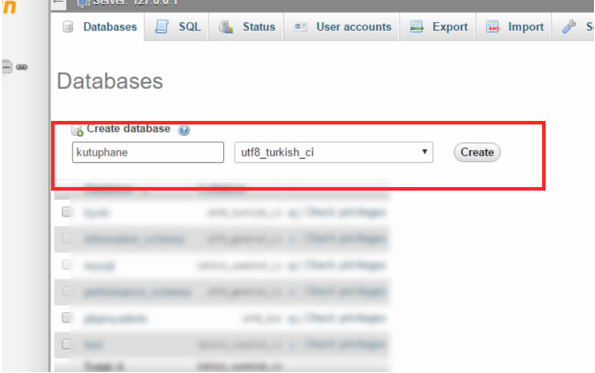
After clicking the create new database link, we select the database name and the language option to be used as Turkish_ci or utf8_bin as shown below.
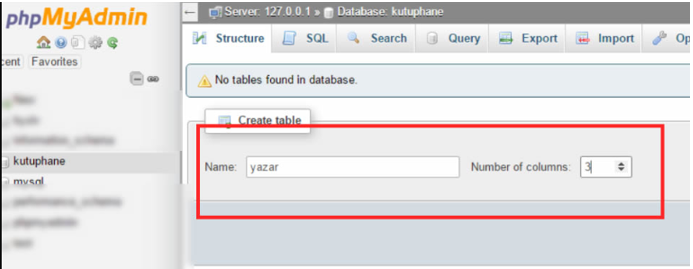
After this process, we will be asked to add a table to the database. We select the author table to have 3 fields.
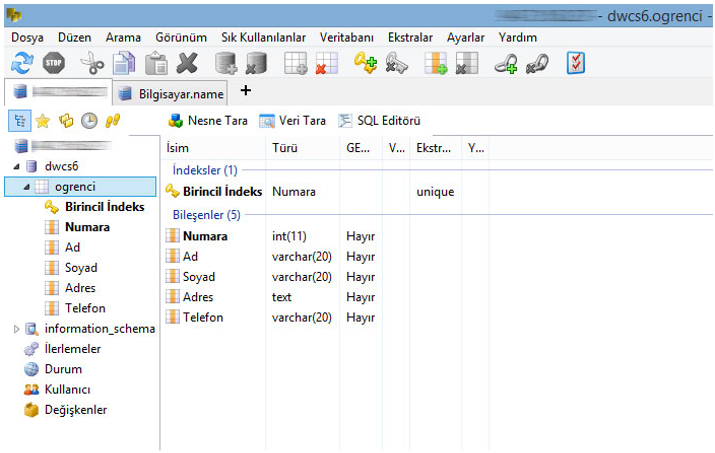
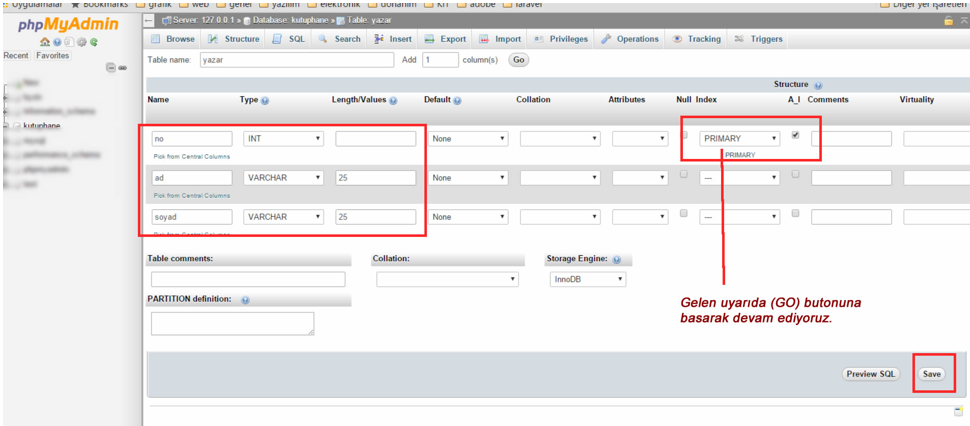
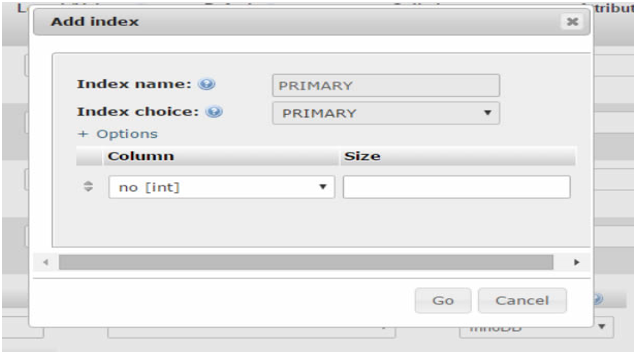
The step after the table addition process is to create the column (field) names within the table. As shown in the picture, we add 3 fields to the author table. We set the 1st field as Primary key and A_I (Auto increment). Since the author's name and surname field is of text type, we set it as var_char(25). In the primary key process, it may be stated that you need to confirm. If a confirmation appears, pressing the go button will be sufficient.
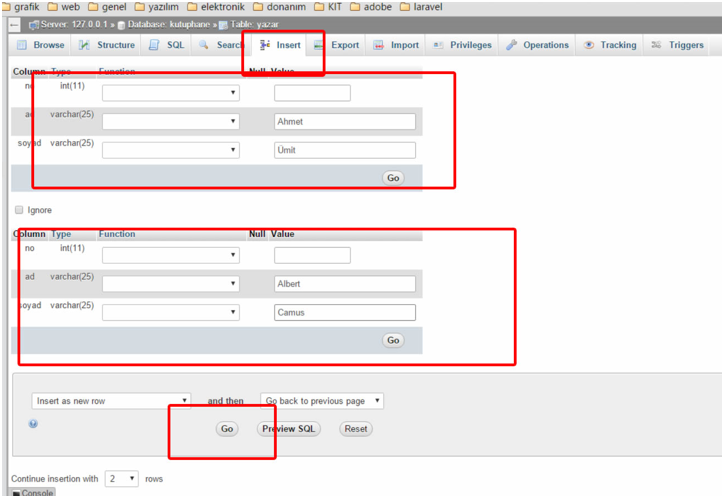
After creating the table, let's make two sample record entries to our table with the phpmyadmin interface. Click on the Insert link in the horizontal menu and after entering two samples, click the GO button.
And thus we have created a sample database.
Running the Project
We need 3 extra jar files to run the project. You can access them from here. After starting the project with NetBeans, we need to add these jar files to the Library section. After starting Apache and MySQL in XAMPP, we can run our project.
Hospital Management System Project Interfaces
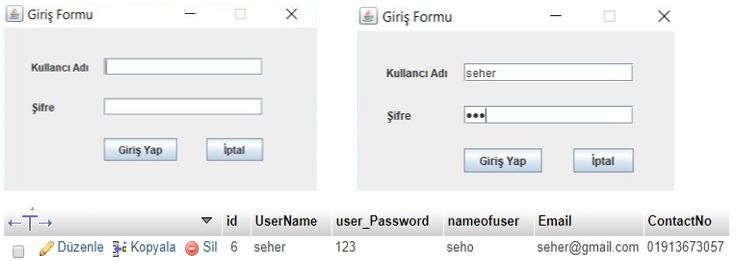
We will be able to perform operations with the tabs on our main screen.

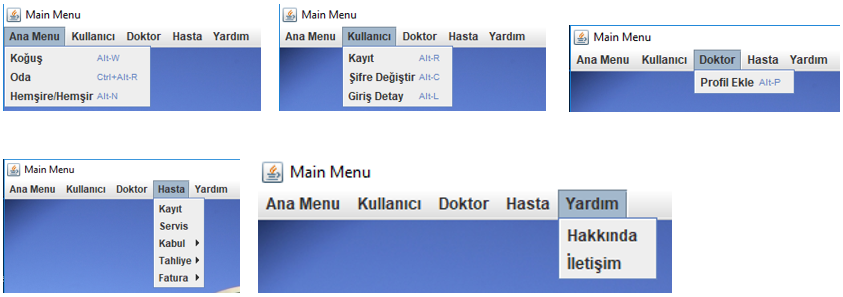
This is the design of our project.
Database
Our project's database consists of 13 tables. There are tables including patient admission, invoice, discharge, doctor, patient registration, room, service, nurse, and ward.
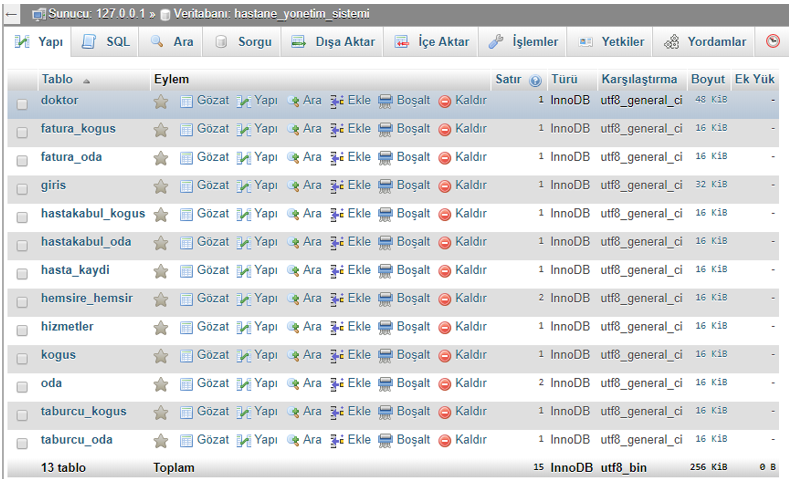
I added some data to each of the tables. You can also add various tables according to your own preference.