Introduction to Fiori
ERP, SAP, ABAP
Hello everyone. In today's article, we will enter the world of Fiori, which I am also still developing myself in. Before we get to the question of what Fiori is, I want to give some basic information.
ERP, SAP and ABAP
ERP (Enterprise Resource Planning), which means Enterprise Resource Planning, can be defined as the general name given to systems that bring together all the structures that an organization needs, such as planning, production, operations, etc., under one roof. The most well-known and widespread program in the ERP world is SAP. SAP is a system divided into modules to meet all needs. We can give examples such as the SD (Sale and Distribution) module responsible for sales and distribution of companies, and the PP (Production Planning) module responsible for production and planning. Each module requires expertise in its own field and is trained accordingly.
ABAP (Advanced Business Application Programming) is an object-oriented, high-level programming language developed by SAP for the development of SAP software. With ABAP, desired information is read from the database, necessary fields for adding records to the system and user interfaces that enable data exchange between SAP systems can be written and reported.
Since our topic today is Fiori, I wanted to start by talking about the general SAP structure. You can access a lot of information about SAP and its components on the internet. Reminding that we also need ABAP knowledge on the backend side to develop Fiori applications, we can now introduce Fiori...
What is Fiori?
It is a user interface that makes ABAP screen outputs more useful, easy and usable on different platforms. It is developed with UI5 technology, which is a combination of User Interface and HTML5. For a Fiori application to work, GW server, backend and frontend installations are required. WebIde is the development environment where we develop Fiori applications. WebIde can provide different environments that we can use directly in the browser or locally. There is no need for an external installation like SAP GUI for WebIde, but we need different installations to be able to use it. We will continue with Local WebIde installation and usage in terms of easy accessibility during the installation phase and that everyone from beginner level Fiori users can use comfortably.
![]()
Local Web IDE Installation
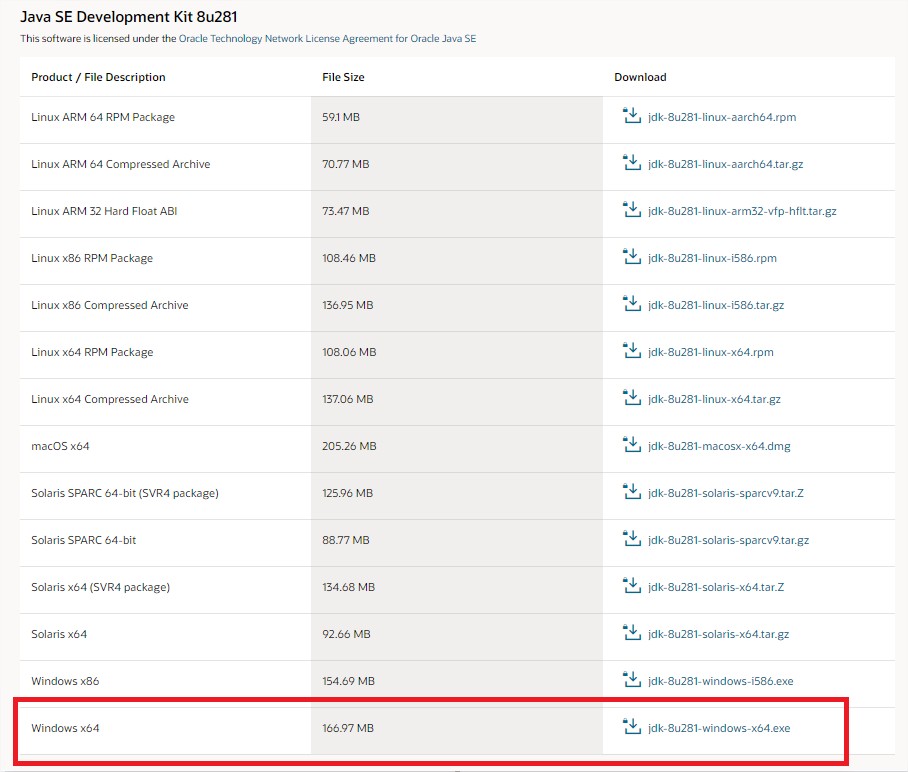
First, we need to download JDK 1.8 version from the link here.
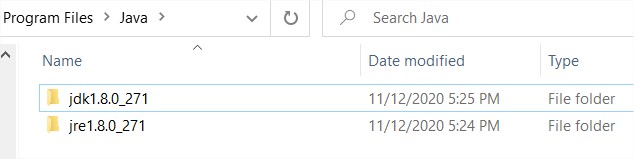
When we run the file we downloaded, a Java folder should be created in "Local Disk C:/Program Files" on our computer and there should be two folders as jdk and jre inside it.
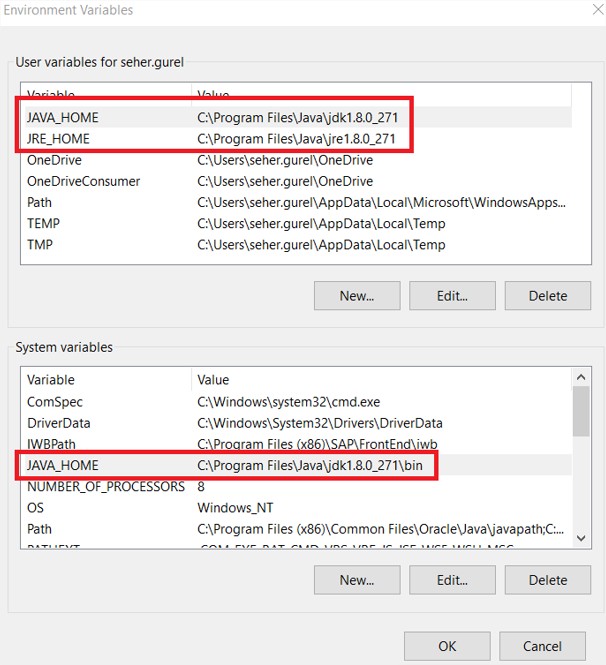
After making sure that our JDK files are downloaded without any problems, let's enter our computer's Environment Variables screen and make the following additions:
After completing this step without any problems, let's go to the link here and download the link we need to run to be able to use Web IDE.
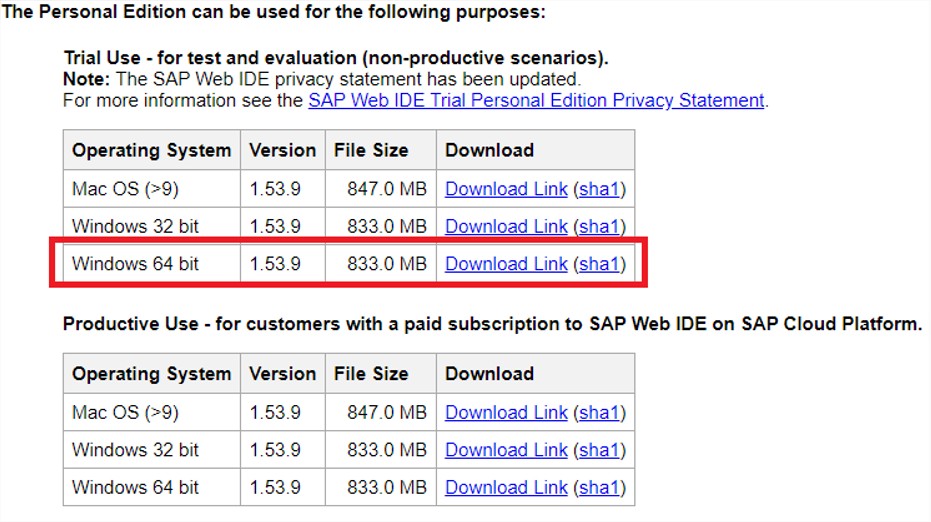
After downloading the file here, before extracting it from the zip folder, create a new folder in "Local Disk C:/" and name it SAPLocalWebIDE. Extract the file you downloaded inside this folder.
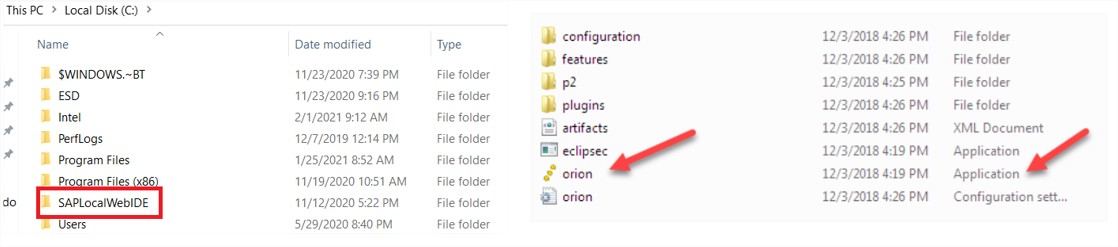
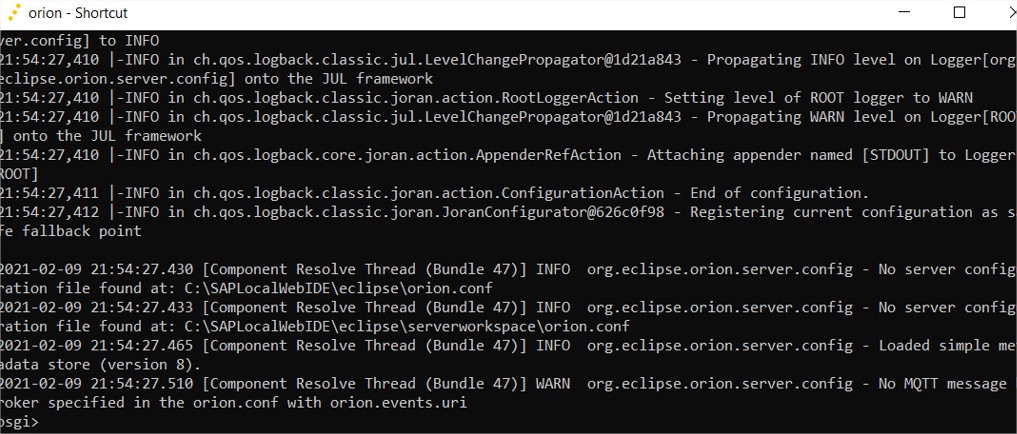
Let's run the orion file in the folder we extracted. If the server is started successfully, you will see the screen below. Also, let's not forget that the orion file must always be running when we use Local Web IDE.
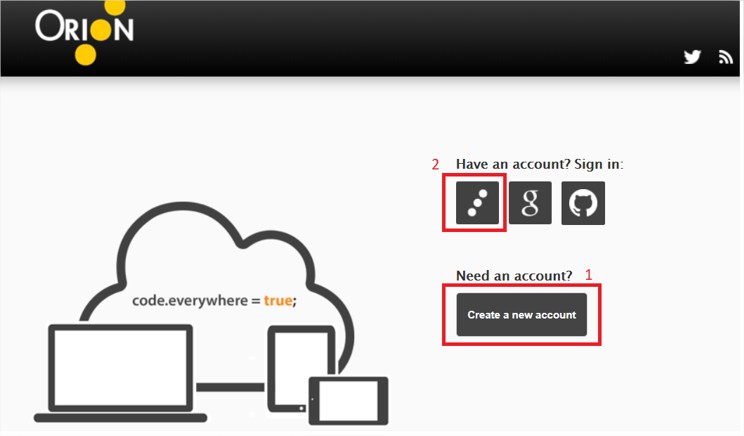
After getting through this step without any problems, we need to enter Localhost. Now let's run the localhost link and connect to our Local Web IDE interface. Here we can create a new account in our name and log in.
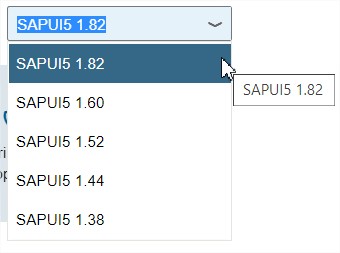
After completing this installation, the versions offered to start development are not current versions. In case of need, to work with more current versions, you can follow the steps here. I also downloaded more current versions other than the existing versions and will continue development this way. You can also continue development by downloading the most current versions.
Local Web IDE Interface Introduction
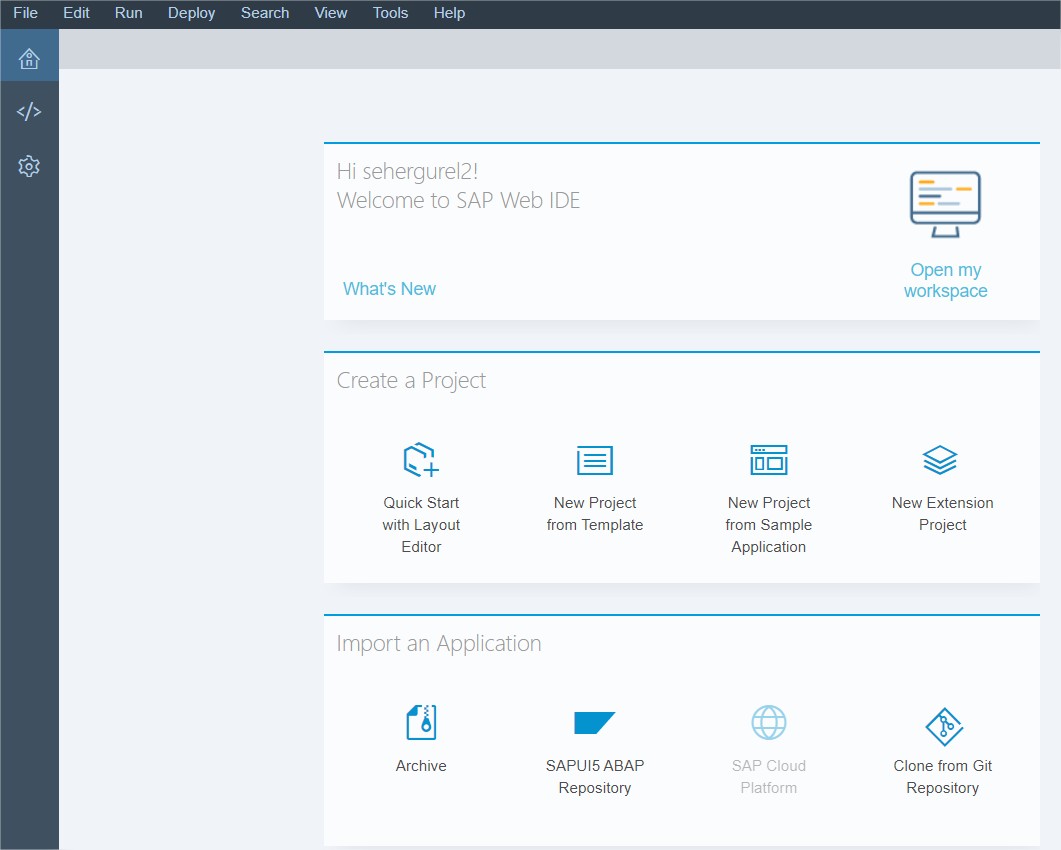
From here on, we will share the information we need at the beginner level and reinforce it with simple examples. If we first introduce the general interface; the first screen that will welcome us after logging in is the Welcome screen. The Welcome tab is the area where shortcuts used in development are brought together. Project creation etc. can be done from here.
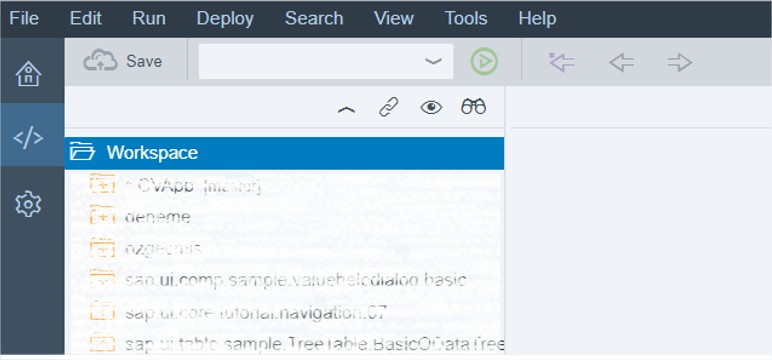
The next tab is the Development tab. All created projects are found in this tab. Also, project creation etc. is done here rather than from the Welcome tab. This is the tab used in the Local Web IDE development environment.
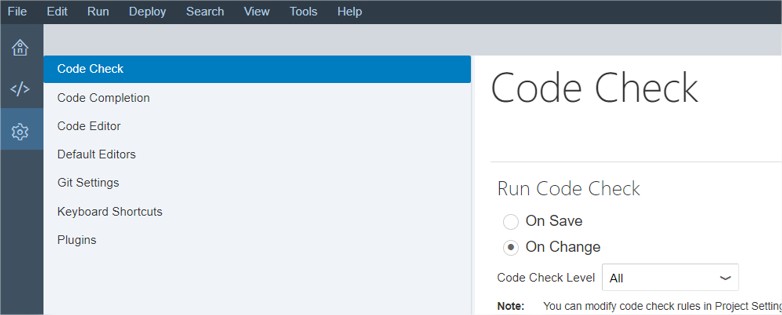
The next tab is Preferences, which is the part where we can view and make changes to technical information. You can set changes that look better to us or provide usability, such as automatic code block organization (Beautify), automatic saving, theme settings.
Creating a New Project
As a first step, let's see how to create an application without connecting to any service. You can create your project by following the steps below, select the version you want and name it.
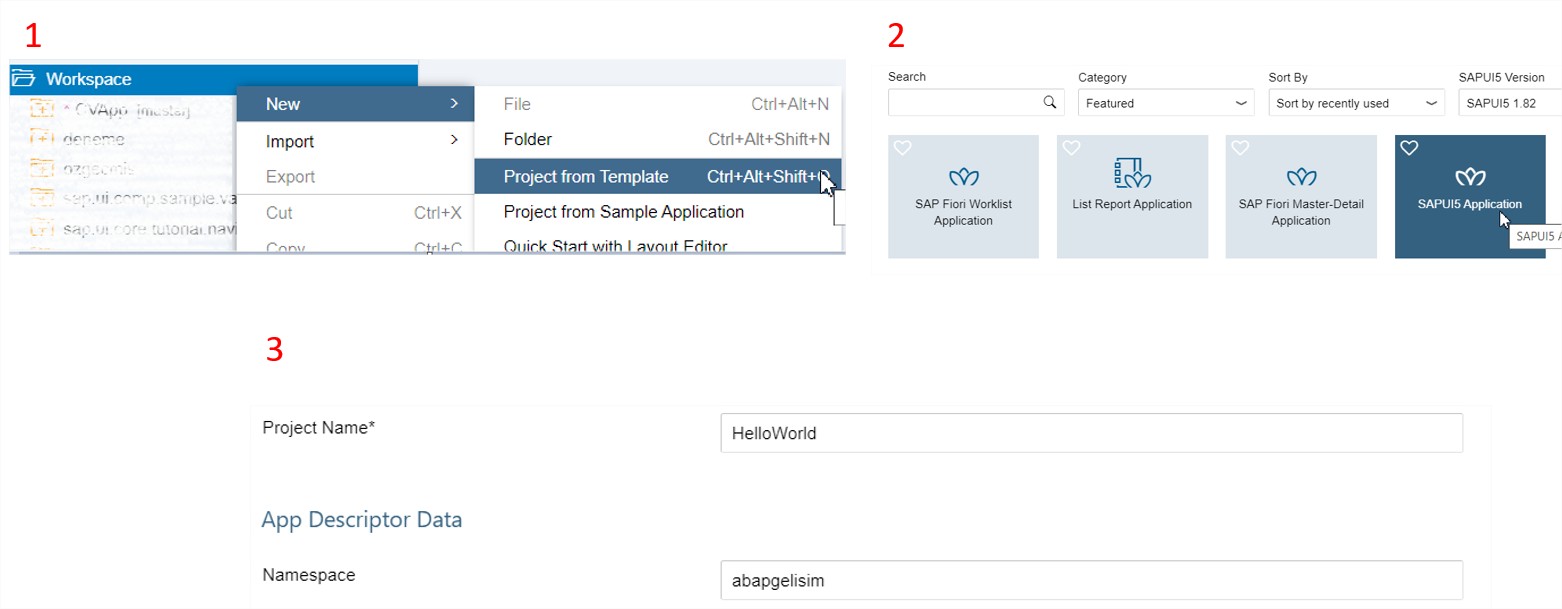
After creating the project, a folder will be created for us under Workspace in the Development tab.
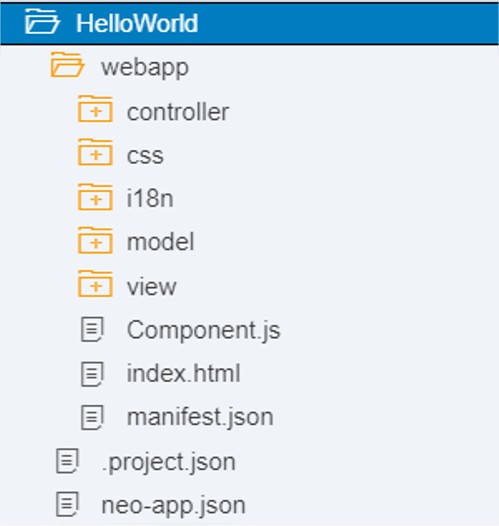
HelloWorld : Project Name
Webapp : The main folder that hosts all files required for running the application.
Controller : Controls of fields within the View are performed.
i18n : Where naming parameters are located. When we write titles, texts etc., instead of manually writing them to the screen, we define them here and use their short definitions. It is also used for language maintenance. You can access detailed information and examples here.
Model : When we want to create and use a new model, it is defined here. Not much needed.
View : The folder where screen design is done. XML codes are written here.
Component.js: Used to make the application operational at startup.
Index.html : The part where the application is pressed and run.
We can start project development by doing page design with View. Let's briefly talk about the meaning of the lines in View:
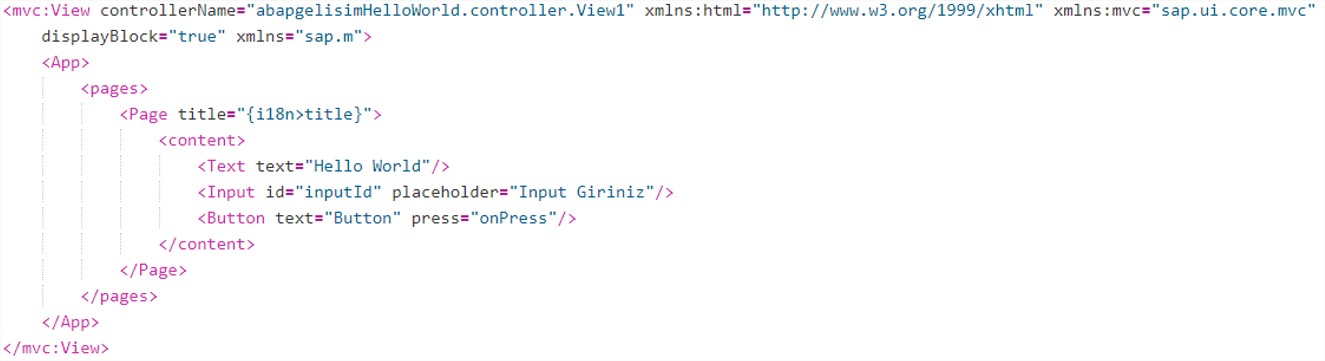 controllerName: The name of the controller that manages the View. A single controller can manage each view.
Xmlns : Libraries.
Our entire page is located between Page tags and we can write all the tags we want to add to the page inside the content.
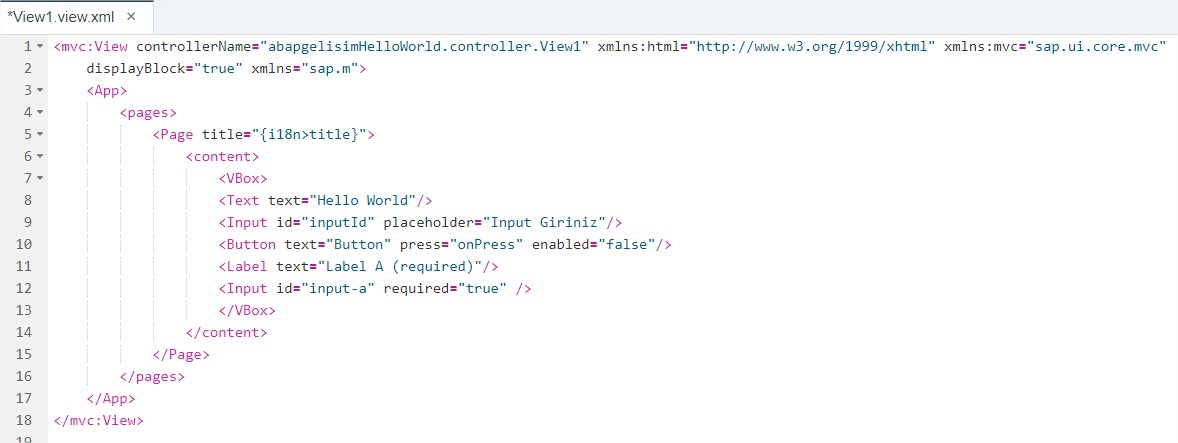 As seen in the image above, all codes are written inside tags. To give an example of the expressions we want to trigger in View; the events we specify with press that we put inside the button above are triggered within the controller file. We perform our controls with javascript codes inside the Controller.
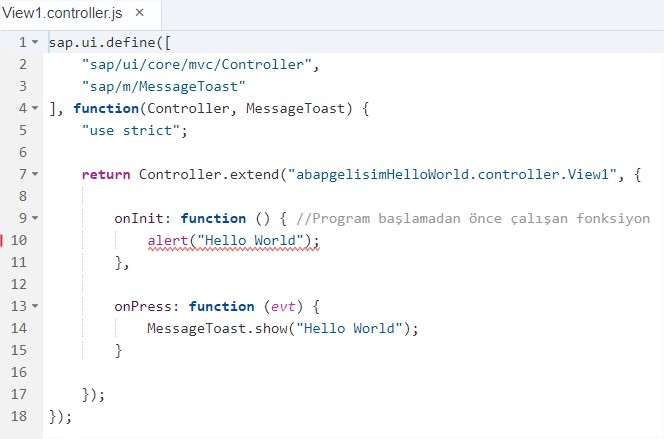
 As in this example, we triggered the onPress function we gave inside press here and ran it by pressing the Run button and printed a message to the screen. We can also define the libraries that SAP offers us with wide options that we want to use in our applications under sap.ui.define.
In this article, we made a small introduction to Fiori. In this article where we talked about the installation and usage of Local Web IDE, I only showed a tiny fish in the ocean. You can also benefit from the documentation that SAP offers us, with which we can develop applications containing countless features that we can use. Everything you are looking for is available in this documentation. Also, depending on which version you will work with, you can continue your research by changing the version of the documentation according to yourself. In my next article, we will talk about ODATA Web Services and reinforce it with a basic example.
Thank you for reading...
← Back to TECHNOBLOG